
How to use OAuth 2.0 to Access Google API Services
Google has an extensive amount of user data and services around that data, and they allow access to these via APIs that third party software can call. There are so many opportunities to build something new on the foundations laid by people like Google, so as a simple example, I will go through the steps that it takes to authorize your third party app (whether it’s a web app, phone app, desktop, etc.) with Google so that you can use any Google API of your choice.
While this does not do a whole demo of OAuth 2.0, I’m using this single example to give an idea of how it works. Other places may be similar. We’re going to focus on building a single app to use OAuth 2.0 for accessing Google data for the user.
In my example, I’m using React (a JavaScript framework) to build a really simple front-end application to view your Google Drive files. Specifically, I’m using an open source project (React-google-drive-picker) that is a React hook for accessing Google Drive and which uses OAuth 2.0 for the user to authorize the third party access to their Google Drive.
Overview of OAuth
This is an extremely simplified overview, for something more detailed (without reading through the actual RFC), take a look here. In short, OAuth allows third party applications (our React app in this case) to a user’s data on a service (Google in this case). To have strong security, we don’t want to provide our username and password to a third party app, so OAuth allows the third party app developer to register their app with the service which, will provide their own login to the user when they are requesting access.
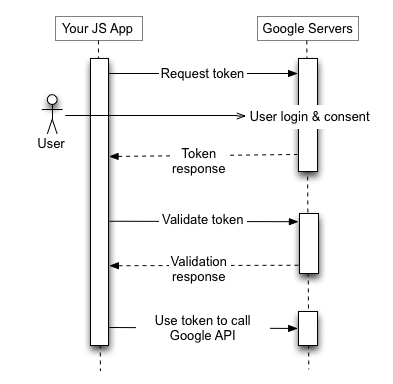
- The third party app developer registers their app (the React app) with the service (Google).
- The user wants to access data from a service (in our example, they click a button to view their drive files).
- The third party app (React app) contacts the service (Google) to identify itself (using a client Id it that was generated when the app was registered).
- When the service (Google) recognizes the client (React app) sending the request it returns a separate page to the user where they can enter their credentials.
- The user enters their credentials and the service (Google) generates an authorization token and sends it back to the third party app (React app).
- Whenever the third party app (React app) makes a request, it sends that token to the service (Google), and the service then responds with the data requested for that user in the request (up until that token expires).
Our React App
We’ll start with building a very simple React app to access Google Drive. I bootstrapped mine with the common command:
npx create-react-app google-drive-pickerYou can call it whatever you want — this is just what I chose. Since this is really just a proof of concept, I’m utilizing the React-google-drive-picker project to do the heavy lifting. We start by installing the package to our project.
npm i react-google-drive-pickeror you can also use yarn
yarn add react-google-drive-pickerThe README in the open-source project provides sample code for utilizing their React hook to select a file from Google Drive to get the information for that file which can be used by the third party application. Since this is a proof of concept, I’m not going to do anything with the data, but just show that we have the data.
Using the example from the README, we fill out the following:
import logo from "./logo.svg";
import "./App.css";
import { useEffect } from "react";
import useDrivePicker from "react-google-drive-picker";

function App() {
  const [openPicker, authResponse] = useDrivePicker();
  // const customViewsArray = [new google.picker.DocsView()]; // custom view
  const handleOpenPicker = () => {
    openPicker({
      clientId: "xxxxxxxxxxxxxx",
      developerKey: "xxxxxxxxxxxxxx",
      viewId: "DOCS",
      // token: token, // pass oauth token in case you already have one
      showUploadView: true,
      showUploadFolders: true,
      supportDrives: true,
      multiselect: true,
      // customViews: customViewsArray, // custom view
      callbackFunction: (data) => {
        if (data.action === "cancel") {
          console.log("User clicked cancel/close button");
        }
        console.log(data);
      },
    });
  };

  return (
    <div className="App">
      <button onClick={() => handleOpenPicker()}>Open Picker</button>
    </div>
  );
}

export default App;
Take note of the following:
const handleOpenPicker = () => {
    openPicker({
      clientId: "xxxxxxxxxxxxxx",
      developerKey: "xxxxxxxxxxxxxx",
      // Rest of the properties
    });
  };
You’ll need to fill in a client id and a developer key; both of which will be obtained by going to the Google Cloud Console and registering your application.
Registering your application
For a client using OAuth 2.0, you’ll need to register your app with the service whose data you’re going to be using. In this example, I am using a Google Drive picker web app that the user can use to access their Google Drive. OAuth 2.0 requires that a 3rd party application looking to use a service (like Google or Facebook) is registered with that service. That registration will generate a client id and a client secret that will need to be passed when requesting a token.
3rd party applications can be registered using Google’s Cloud Console. You can use this tool for registering any app (web, phone, desktop, etc) to be able to access the various API endpoints that Google provides.
New Project
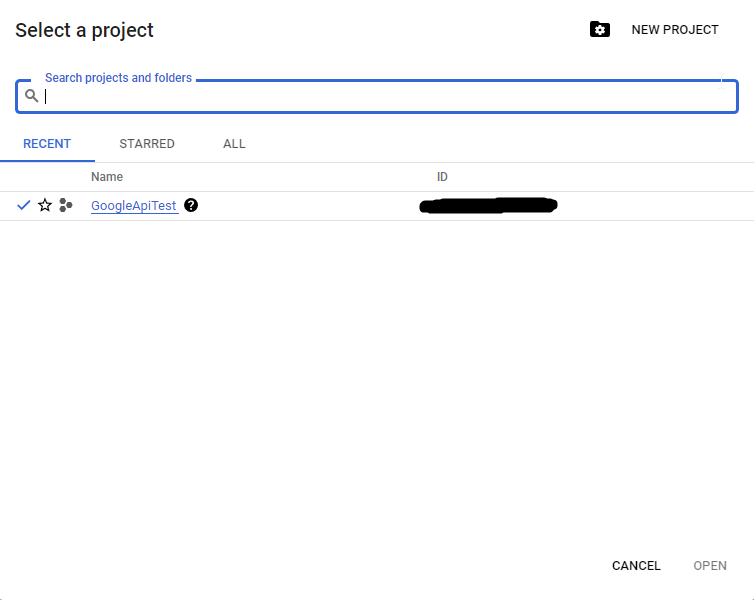
If you don’t have one already, you’re going to want to create a new project in Google Cloud Console. Click the “New Project” button in the top-right corner if you want to create a new project (or select an existing project).
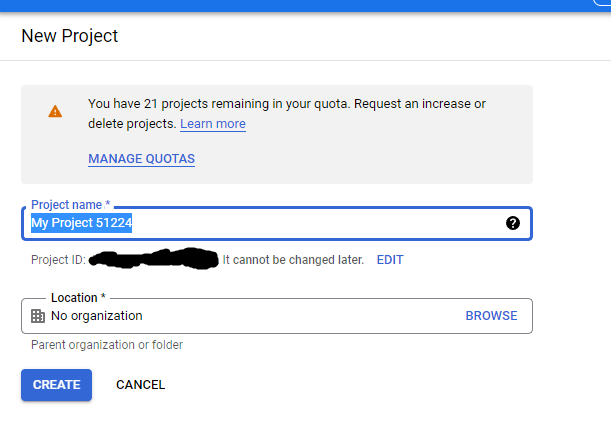
If you’ve decided to create a new project, fill out the name and organization (if any), click “CREATE” then follow the prompts to get your project created.
Enable the Google Drive API
To see the APIs and Services you have enabled, you need to navigate to the APIs and Services page in Google Cloud Console.
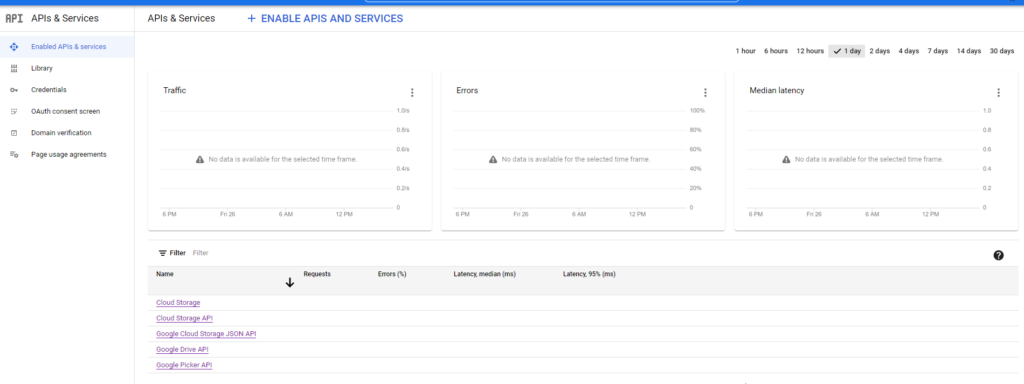
You can get there from the Google Cloud Console home page by clicking on the “View All Products Button”

Then clicking on the “APIs& Services” link
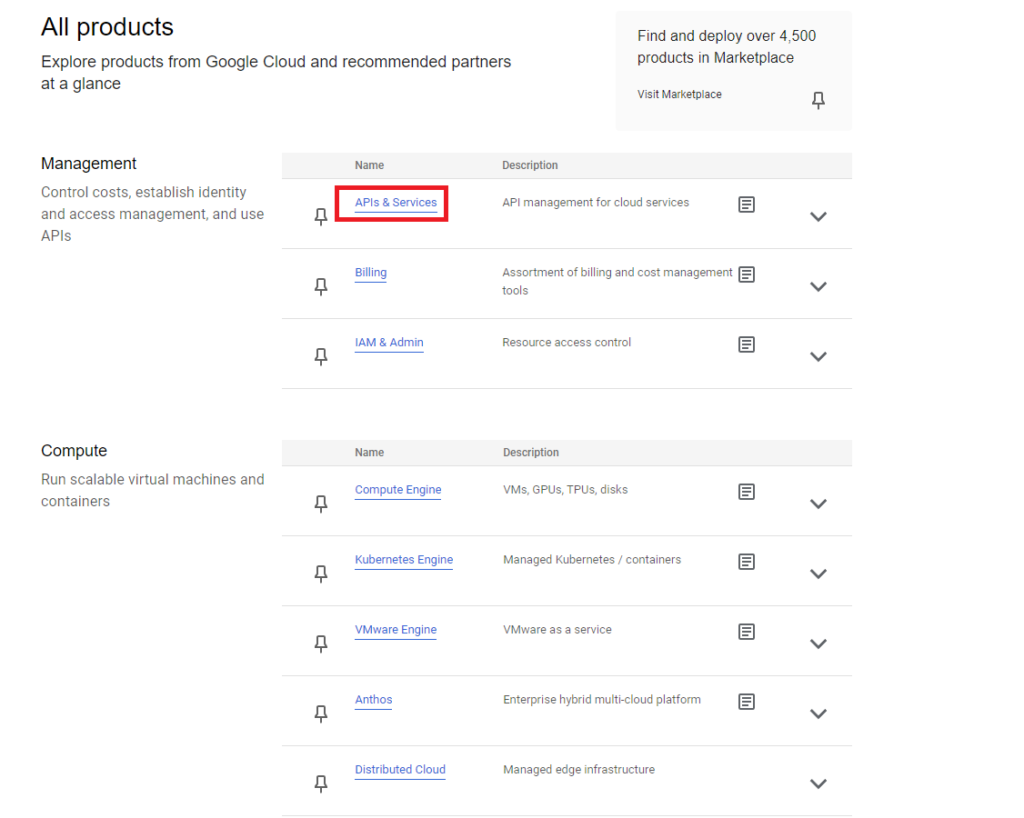
You’ll then want to enable the Google Drive API

Follow the prompts to enable the Google Drive API. When you’re finished, you should get something that looks like this.
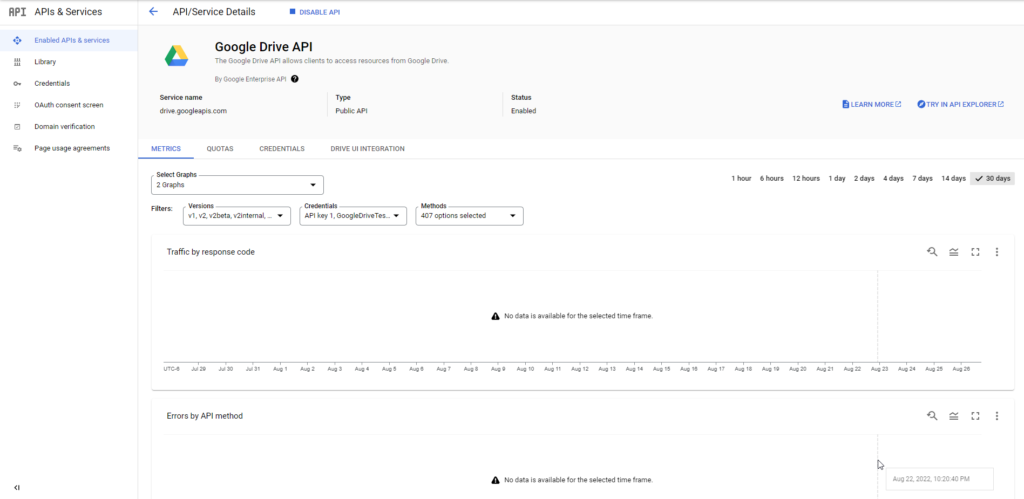
There are two specific things that need to be done in Google to make sure your client works. The first is to ensure you add credentials for your client (which registers it with Google). The second is to set up test users that Google will allow to login while the site is under test (and not published).
Create Credentials
Click the “Create Credentials” link

Choose to create an OAuth client id and indicate it is a web app. Fill in the name of your web app (it can be whatever you like). The essential part is to fill in the URIs for “Authorized JavaScript Origins” and “Authorized Redirect URIs.” It’s important to use http or https depending on how your app is running. I chose to include both.
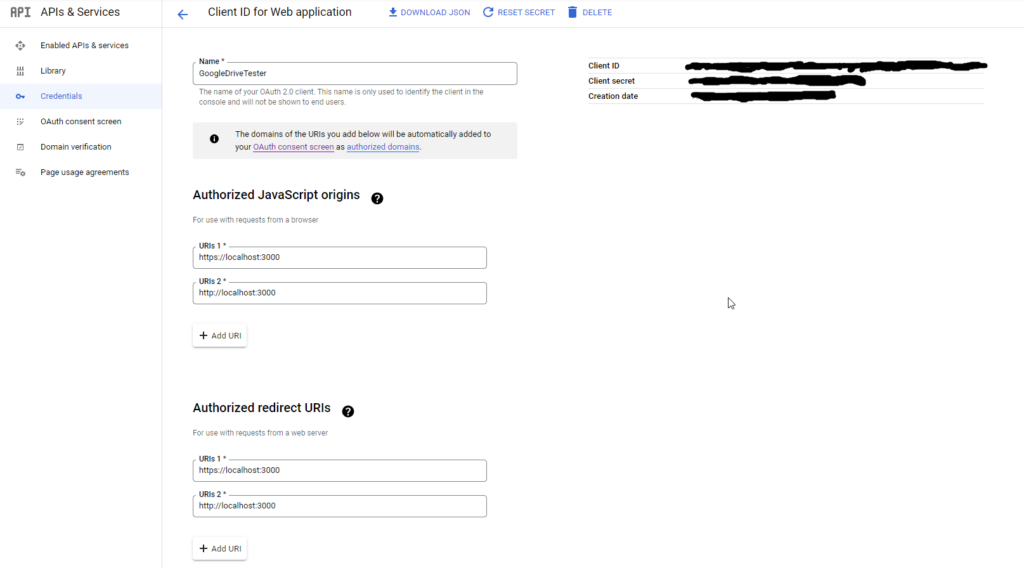
The “Authorized JavaScript Origins” URIs register with Google where it will accept client requests from. If someone else has your app and client id, and attempts to run from a different origin, Google will not authorize the request.
The “Authorized Redirect URIs” are the URIs that Google will redirect to after it has authenticated the user. To review the workflow:
- The user clicks on the button in our app to indicate they want to see their Google Drive files.
- The app redirects to Google who will take the user’s credentials (username and password)
- The app redirects back to our app that made the initial request — this redirection is what is registered in the “Authorized Redirect URIs.”
This prevents someone from trying to redirect to a malicious site.
Adding Test Users
Until the app is published on Google, you will need to register test users that Google will allow to login through your app. While you may not be hosting your web app with Google, the publish action is what indicates to Google that your site is now live. The particular point is that depending on the kind of data your site is requesting to access on behalf of a user, Google will need to do a review to make sure that your app is legitimate. Essentially Google wants to ensure that they’re keeping your data safe and protected so that when someone uses a third party app to access Google data, that person can be confident in knowing they’re safe to use that app.
Before publishing, the test users is just a whitelist of users that you have granted explicit access to use your app. You can get here by clicking the OAuth Consent Screen link in the side bar which will take you to this page:
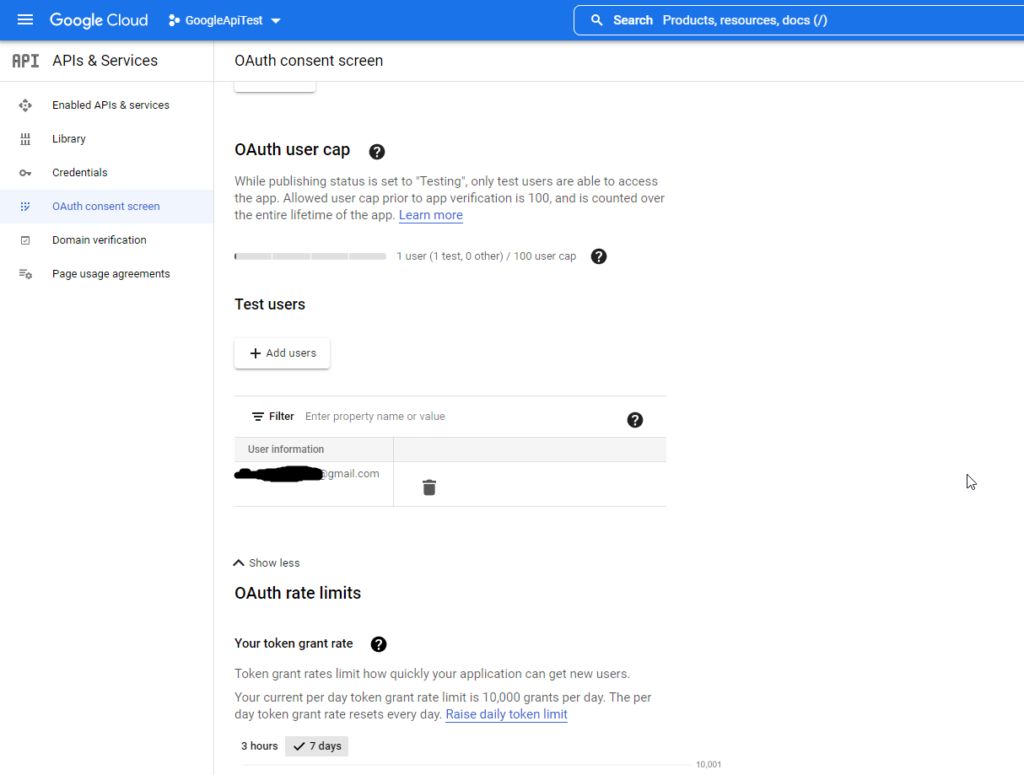
To get to this view, you’ll need to scroll down about halfway. You can see that I have a test user that I have added to be able to login to Google Drive. Click the button “+ Add users” to add more users up to your test user limit.
These steps should cover what you need to do for registering your app to use Google’s API services (Google Drive in this case). We can now move on to updating the client side code to be able to access the user’s Google account. Keep in mind that at this point, only test users you’ve specifically registered on Google can login to their Google accounts on your app until you actually publish it which requires Google to review it to ensure it is not violating any of their security protocols.
Update your code
Now that we have registered the app, we can fill in actual values in the following code snippet:
const handleOpenPicker = () => {
    openPicker({
      clientId: "xxxxxxxxxxxxxx",
      developerKey: "xxxxxxxxxxxxxx",
      // Rest of the properties
    });
  };
The clientId can be found by going to the credentials page for the Google Drive API you enabled in Google Cloud Console.
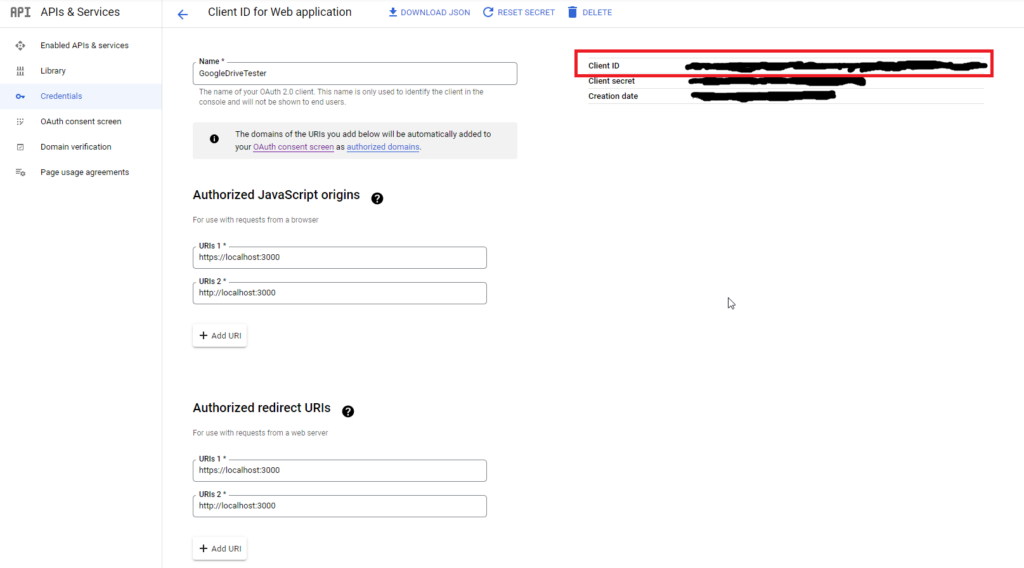
Copy and paste the value on this page for the clientId value in the code snippet above.
When you created your workspace, you should have created an API key that identifies you as the developer. You’ll see it in your credentials page:

Click on the “SHOW KEY” link to get your API key (which is what will be filled in for the “developerKey” value in the code snippet above).
Test Run Your Client
Start your React program to test your code changes.
npm run startThe page displayed won’t be impressive as it only as the button for opening the Google Drive File picker (since that’s what we’re demonstrating in this post).
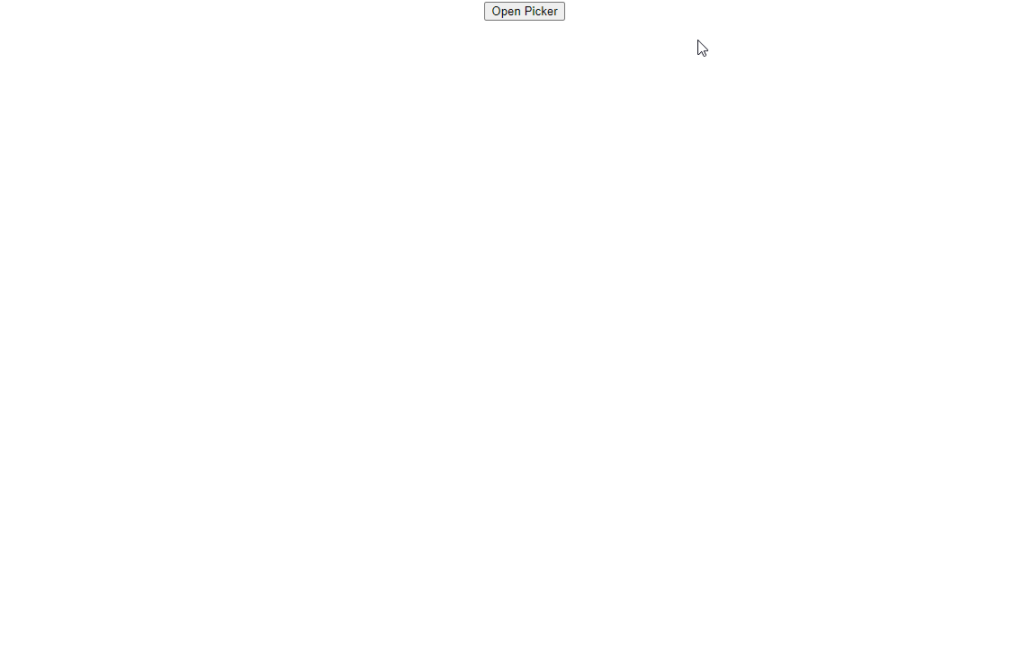
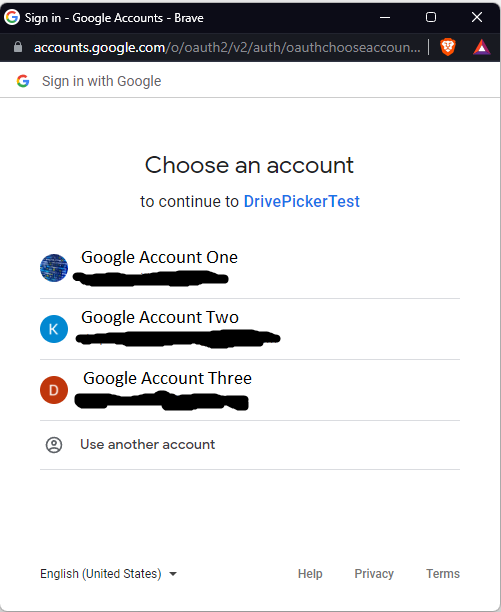
When you click this button, you’ll get a popup for logging into your Google account.
Next you’ll get a screen indicating that Google has not verified the app (unless you have published it and gone through the verification process).
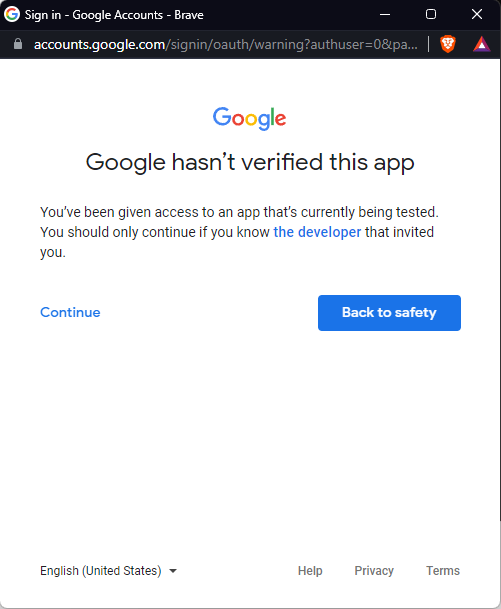
After you click “Continue,” you’ll be shown a modal that verifies with you the permissions that the drive picker app is seeking (and this comes from what was set up earlier when registering the app with Google).
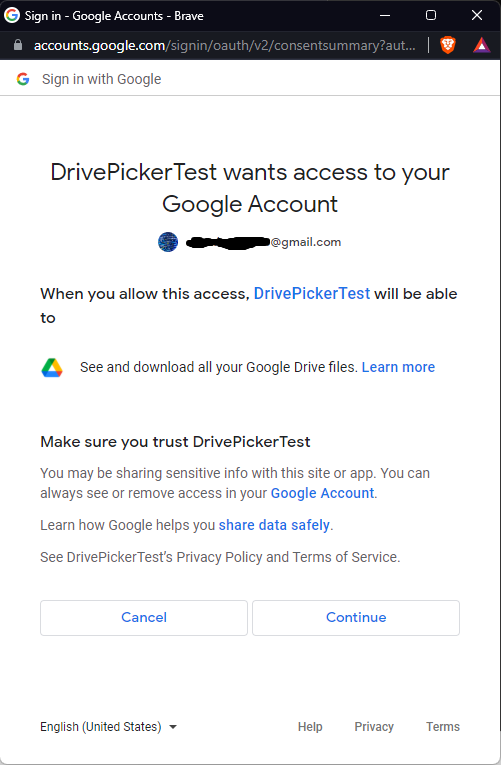
Once permission is given, then your Google Drive files will be shown. You can click any one of them, then click “Select,” at which point, the file data is logged to the console and the drive picker is closed.
Because this is a proof of concept, no additional work was done with the file information after it was retrieved, but this gives an opportunity to tap into more of Google’s API services to do something interesting with your Google Drive files.
Conclusion
Ultimately some version of this set up will need to be done to interact with any reputable API that provides access to protected data. Each API should have really good documentation on how to set up your app to authenticate with their APIs so that you can do something interesting with their data and services. The next challenge is to come up with a creative solution that you or others may find useful.